User Guide: Eyebeam 1.5
- User Guide: Eyebeam 1.5
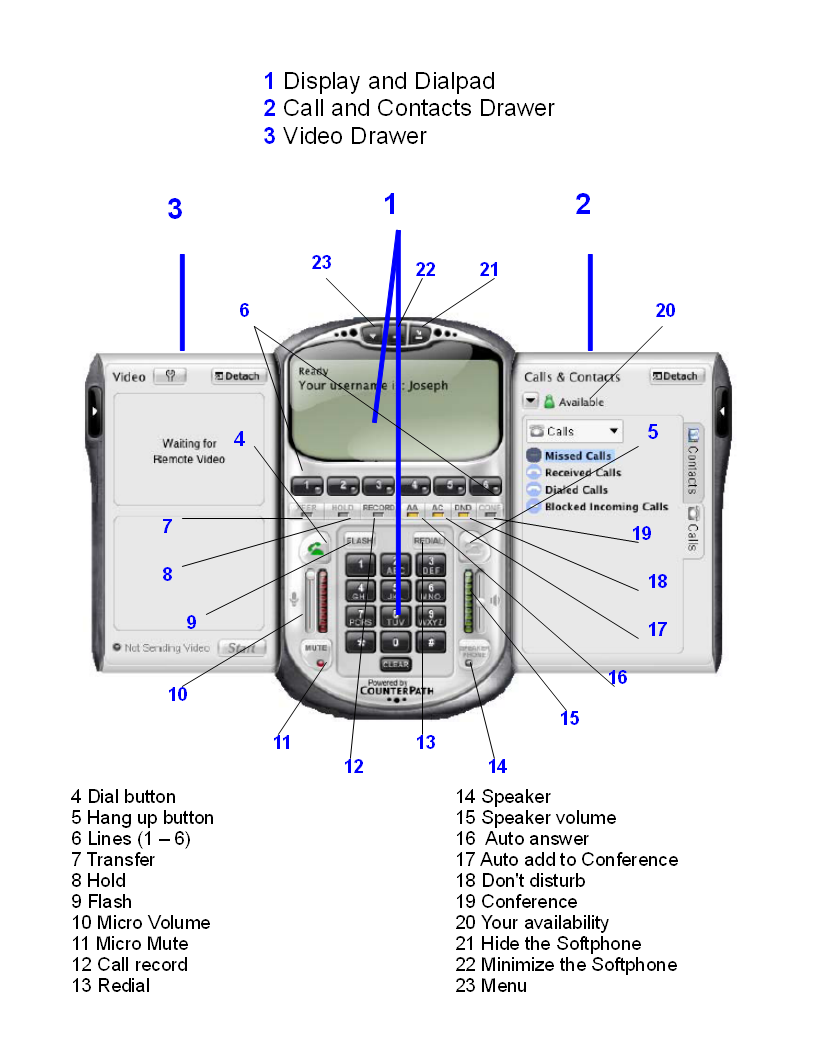
1. To make a call
Click the digits on the screen keypad (1) or use your PC keyboard.2. Answering a call
Click on "DIAL" (4)3. Call Hold and Resume
During a call, press "HOLD" (8) : the call is placed in on hold and music is played. Press "HOLD" again to retrieve call.4. Mute
During a call, press "Mute" (10) : (no music is played)5. Call conferencing
Make a call to the first party. Make a call to the second party (and more if wanted, maximum 6) Press "CONF" (17) to start the conference.6. Unattended call transfer (blind transfer)
During a call, press "XFER" (7), dial the number, and press "XFER" (7) again. Third party is not informed about transfer!7. Attended call transfer
During a call, select another available line (the first line is automatically put on hold). Dial the number, inform the 2nd party, press "XFER" (7) and select the line associated with the original party.8. Redial
Press "REDIAL" (13) to dial the last called number.9. Volume Adjustment
Slide the volume bar during a call to adjust volume of communication.- Left volume bar = microfoon volume (10)
- Right volume bar = speaker volume (15)
10. Record a call
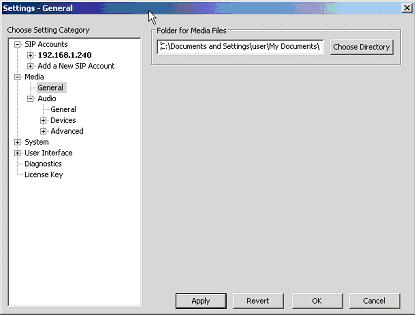
During a call press "REC" (12). Recorded calls are saved where you want. Right click on the eye-Beam / settings.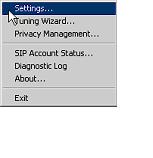
11. Flash
- If you are on a active call, press "FLASH" to provide a new line : the active call is put on hold
- If a call is coming in, press "FLASH" to pick up the call
- If a line is on hold, press "FLASH" to pick up the line
12. Contacts / Calls
Click the upper right arrow to expand the Contact drawer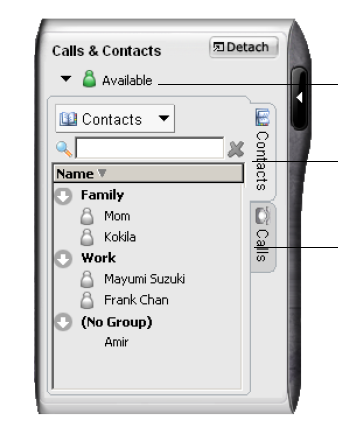 Here you can manage your personal contacts.
13. Call forward all
Users can set their softphone to forward incoming calls to a desired phone number :- 1. Access the Settings dialog by right-clicking and choosing Sip account Settings...
- 2. Select Properties -> In the "voicemail" tab, select "Always forward to this address" and enter the phone number to which you want to forward calls
- 3. Click on "OK" - click on "close".
14. Importing contacts
You can import a contacts list from:- a comma-separated file. Use this method to import from a Microsoft® Excel ® file. You will first have to set up the file. See below.
- a Microsoft® Outlook® or Microsoft® Exchange contacts list (a *.pst file).
- a vCard file (*.vcf file). A vCard is an electronic business card that is often attached to an email. The new contacts will be added to the existing contacts.
- 1. Click the Contacts menu and choose Import. The Import Contacts wizard starts.
- 2. As soon as you click Finish on the wizard, the Contacts tab in "EyeBeam" is updated to show the imported entries. In order to view availability of contacts, you must modify the appropriate entries by changing the Show this contact Availability checkbox. See above for details.
Setting up an Excel File for Import
- 1. Remove any introductory text or headings from the top of the file. (You can keep text at the end of the file : it will be ignored during the import.)
- 2. Insert a blank row as the first row, then insert the headings that "EyeBeam" will use to interpret the meaning of each column.
- display_name
- entry_id
- given_name
- surname
- postal_address.
- 3. Save the file as *.csv.
Exporting Contacts
You can export a contacts list to a comma-separated file, a ".pst file" or a ".vcf file".- 1. Click the Contacts menu and choose Export. The Export Contacts wizard starts.
- 2. When you click Next, the export starts. The result is:
Copyright © Escaux SA