User Guide: Incom ICW-1000G Wifi IP Phone
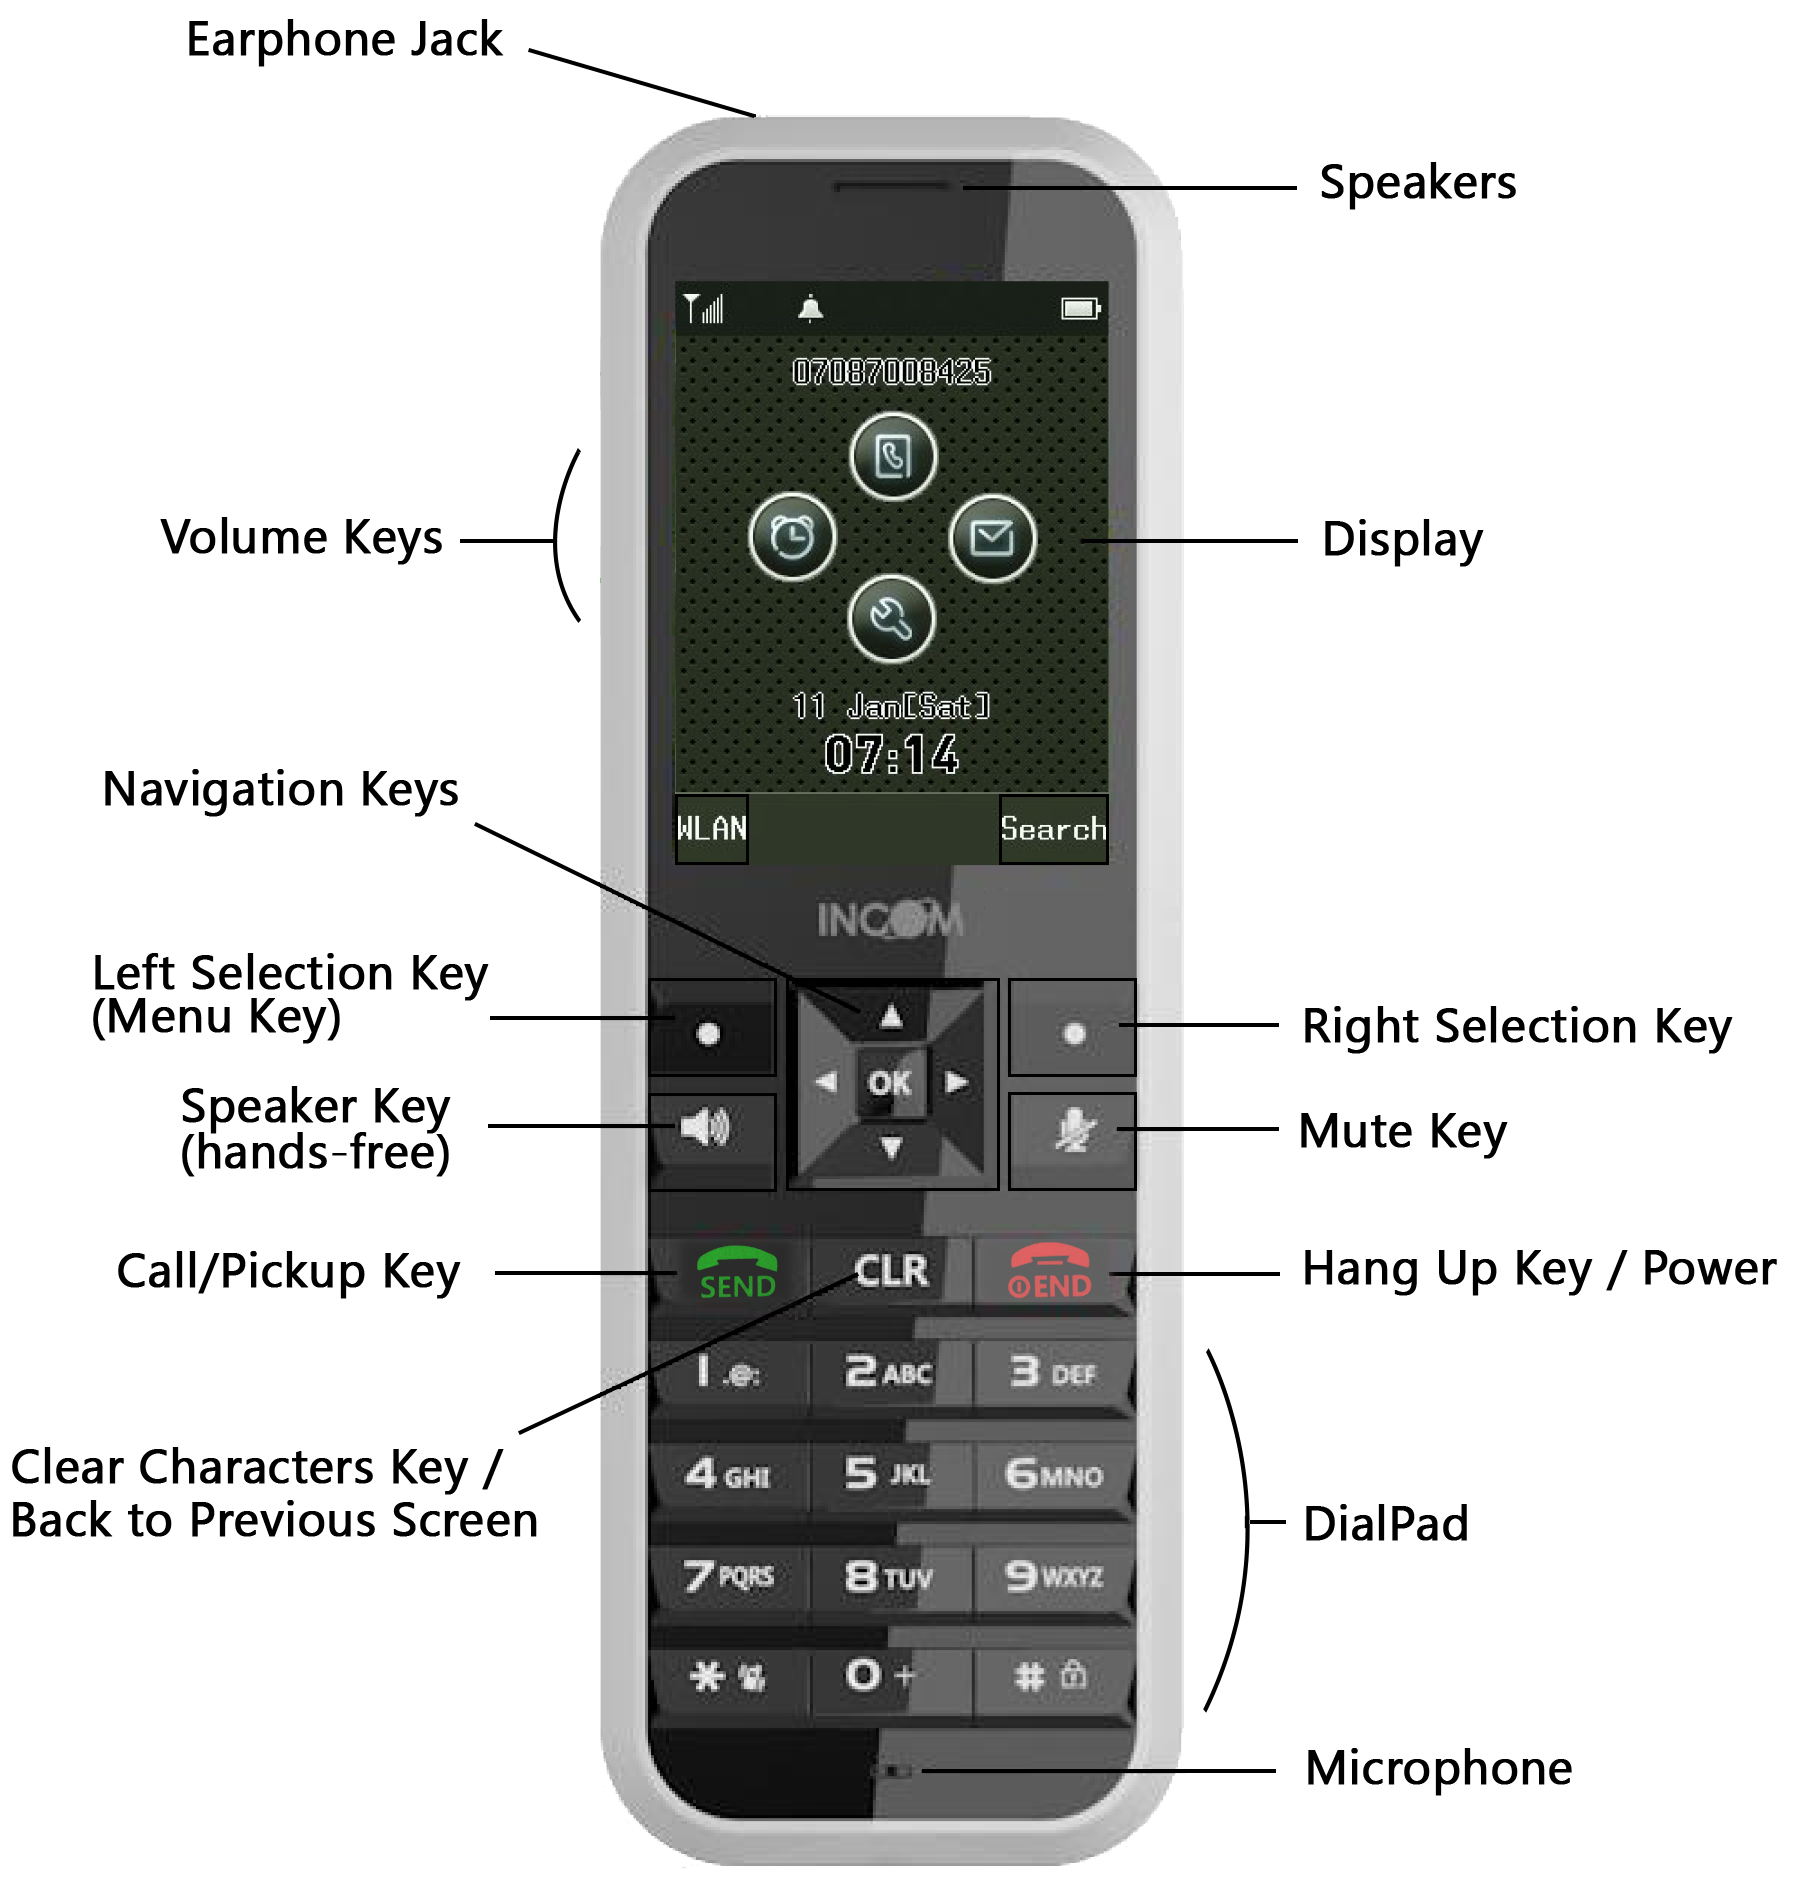
1. Handset diagram
2. Basic features
| If you want... | Then... |
|---|---|
| To power on/off the device | Keep pressing |
| To enable/disable the buzzer | Keep pressing |
| To (un)lock the keys | Keep pressing |
| To (un)mute the microphone | Press |
| To adjust the speaker volume | Press either the UP or DOWN key from the volume side keys |
3. Incoming/Outgoing calls
| If you want... | Then... |
|---|---|
| To call a new number | Dial the number with the dial pad ► Press |
| To call the last dialed number | Keep pressing |
| To call any of the previously dialed numbers | Press |
| To call any of the previously dialed numbers in "hands-free" mode | Press |
| To answer an incoming call | Press |
| To answer an incoming call in "hands-free" mode | Press |
| To deny any incoming call | Press |
| To hang up any ongoing call | Press |
4. Call waiting
| If you want... | Then... |
|---|---|
| To put a ongoing call on hold | Press |
| To take back a waiting call | Press |
| To answer another incoming call during an ongoing call | Press |
| To call another number during an ongoing call | Press |
| To toggle between two ongoing calls | Press |
5. Call transfer
| If you want... | Then... |
|---|---|
| To transfer a call with consultation (Attended transfer) | Press |
| ● If the destination accepts the transfer ► Press left |
|
| ● If the destination denies the transfer or is unreachable ► Press |
|
| To transfer a call without consultation (Blind transfer) | Press |
6. Voice mail & call history
| If you want... | Then... |
|---|---|
| To listen to your voice mails or access your voice mail menu | Dial your platform-specific voice mail extension (contact your system administrator if needed) ► Press |
| To access your call history | Press |
| To save or delete a number from your history | Press |
7. Display
Here is the screen as it is displayed when the handset is in "standby mode":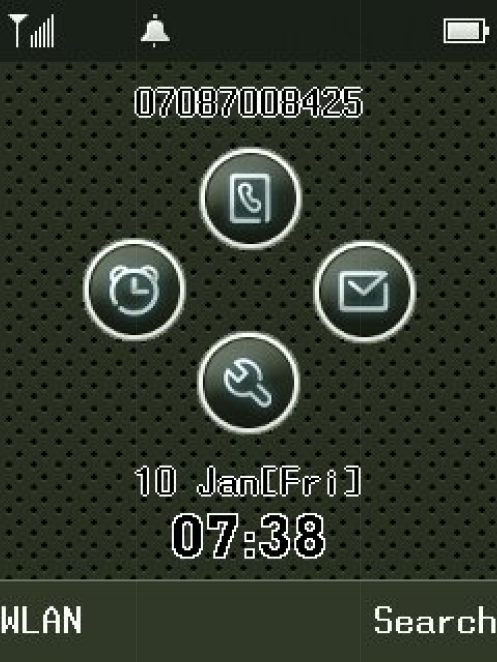
| Icon | Meaning |
|---|---|
| |
Handset not connected to any network |
| |
Handset connected to a network with weak signal |
| |
Handset connected to a network with strong signal |
| |
Handset not able to make calls |
| |
A call is ongoing on the handset |
| |
Handset ringer enabled & handset buzzer disabled |
| |
Handset buzzer enabled & handset ringer disabled |
| |
Handset battery is nearly empty (handset is going to power off) |
| |
Handset battery is low (put the hanset on its charging station) |
| |
Handset battery is fully charged |
8. First use quick setup (intended to system administrators)
8.1 On the SMP
You can configure the "Incom" phone resource as you do it for any other SIP device, expect for "WiFi settings" where at least one configured SSID is required!Just make sure that your DHCP server is properly configured (to enable auto-provisioning) by checking the following guide: DHCP server configuration.
8.2 On the handset
This section will describe how to connect the handset to any available wifi network: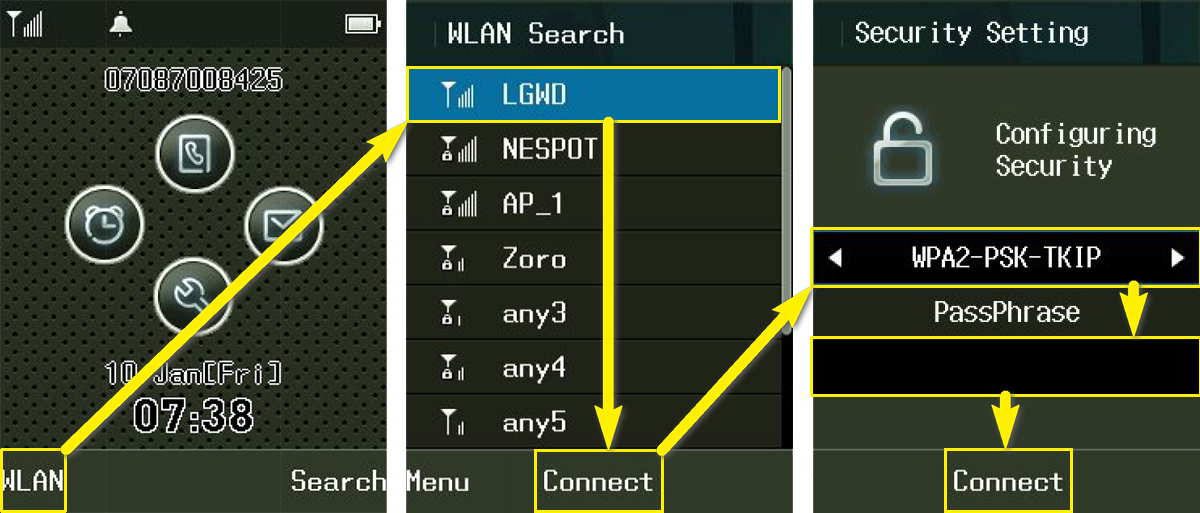
- The idle screen is displayed
- Press left
 (that is labelled "WLAN" in this specific context)
- Press left
-
 Info message displayed: "Searching WLAN network."
- The "WLAN Search" screen is displayed with the list of available wireless access points
- Select the SSID of the AP you want to connect and press
 (that is labelled "Connect" in this specific context)
- Select the SSID of the AP you want to connect and press
- The "Security Settings" screen is displayed
- Select the AP security amongst the 9 suggested encryption algorithms; Normally, the security type should have been detected automatically and set by default!
-
 If the handset is about to connect to a secured wireless network using both WPA-WPA2 mixed, only select the first of them: WPA-PSK
-
- Press the "down" arrow from

- Input the related AP passphrase
- Press (that is labelled "Connect" in this specific context)
- Select the AP security amongst the 9 suggested encryption algorithms; Normally, the security type should have been detected automatically and set by default!
- Info message displayed: "Now generating <security_type> PSK. Wait for a while..." (press to skip it)
- If you get an error message at this point or if you don't see the following info messages, then the security settings on the handset itself were misconfigured!
- To start again from a clean environment, you may want to remove the misconfigured AP profile from the handset by following those steps:
- When on the idle screen, go to the "Phone Settings" by pressing the "down" arrow from
- Select the "Status" menu with and press
- Select the "WLAN Profile" submenu with and press
- Select the misconfigured profile from the list with and press left (that is labelled "Menu" in this specific context)
- Select the "Delete" option from the contextual menu with and press
- From now, your misconfigured profile shouldn't appear in the list anymore!
- When on the idle screen, go to the "Phone Settings" by pressing the "down" arrow from
-
- Info message displayed: "Start auto provisioning!" (press to skip it)
- Info message displayed: "Restart network." (press to skip it)
- Info message displayed: "Now generating <security_type> PSK. Wait for a while..." (press to skip it)
- If you get an error message at this point or if the signal icon has not changed from
 to
to  , then the security settings of the handset resource on the SMP were misconfigured! (report this issue to your system administrator)
-
Copyright © Escaux SA