Creating an USB flash drive with SOP baseline software.
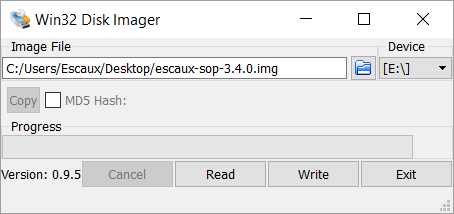
Baseline 3.4.X
- On Windows, the Win32 Disk Imager tool can be used to write the iso or img file to the usb key:
Baseline 2.x.x
Follow this procedure to create a bootable USB flash drive with the Escaux SOP installer by using a Microsoft Windows machine.- Download the Escaux SOP baseline
- Insert a USB flash drive larger than the size of the SOP baseline in an available USB port. All data on the flash drive will be erased.
- Download and execute an USB bootable key maker for Windows:
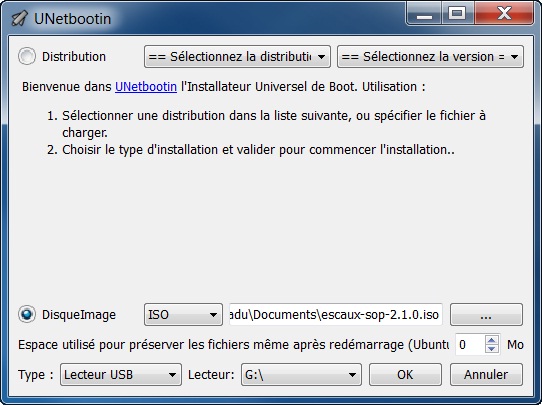
- UNetbootin (easier to use) Local mirror - Main site
- Copy the image file to your local machine
- NB: UNetbootin for Windows does not support storage of the image file on a network drive. If you do try this, you'll most likely encounter the error "An error occurred when attempting to get a handle on the file".
- Select DiskImage (second radio button)
- Click on '...' and select the SOP image previously downloaded
- Select USB Drive and the correct drive letter, then press OK
- Copy the image file to your local machine
- UNetbootin (easier to use) Local mirror - Main site
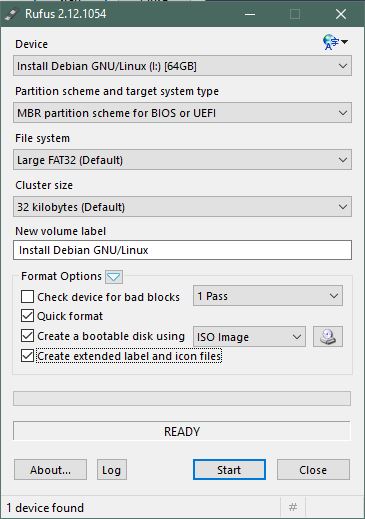
- Rufus USB (more reliable) Local mirror - Main site
- Copy the image file to your local machine
- Select the Device (in this case your USB key)
- Select 'MBR partition scheme for BIOS and UEFI' as Partition scheme and target system type
- Keep the default 'Large FAT32 (Default)' as File system
- Keep the default '32kilobytes (Default)' as Cluster size
- Choose a name if you'd like to, or keep the default one
- In Format Options
- Uncheck Check device for bad blocks
- Check Create a bootable disk using [ISO Image] then browse your local machine for the image file you downloaded
- Check Create extended label and icon files
- Hit the Start button below
- (optional) On the newly created drive, customize
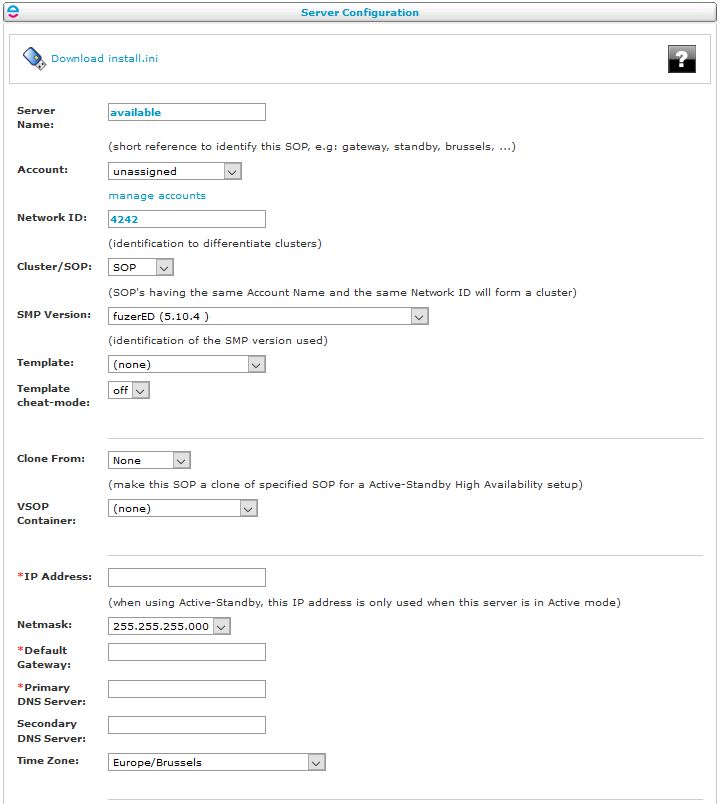
install.ini(use wordpad, not notepad)- An easier way to have an quickly configured
install.iniis to download it from the SMP web admin page, under Advanced > Server Configuration. To do so:- Load the "empty" public template
- Add the configuration values in the fields (IP, netmask, ...) then hit the Save button below
- Click the Download install.ini link at the top of the page and paste it in the file system on the USB key
- An easier way to have an quickly configured
- Safely remove the flash drive.
Notes about bootability
Most but not all USB flash drives are reliable for booting, even many of the slower ones, and they are much cheaper, and should be OK particularly for regular read-only live operations. Some of them cannot be used for booting. They are made to be mass storage devices, and have not exactly the same electronics and firmware. Some USB flash drives and servers 'do not like each other'. The flash drive might boot another server, and the server might boot from another flash drive (everything else being the same). If you're having trouble booting from your USB flash drive, try these tips:- Use another USB flash drive
- Use another application to write the baseline image to the USB flash drive
- Plug the flash drive in another port
- Use a USB 2.0 port instead of an USB 3.0 port (if applicable)
Some information from this page is based on https://help.ubuntu.com/community/Installation/FromUSBStick
Copyright © Escaux SA