Administrator Guide: Polycom Directory Service
Integrate the Escaux UCS internal directory in the Polycom phones
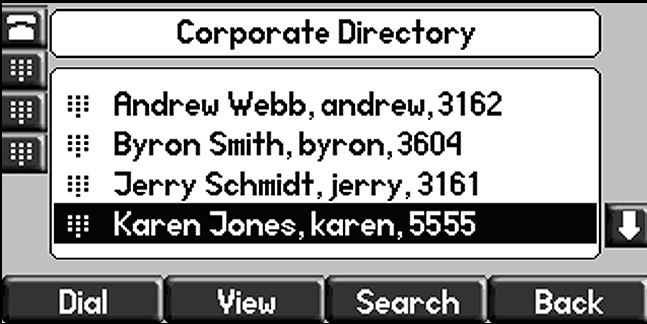
The corporate directory allows the user of the phone, to search for a contact and call him. This is implemented with the help of the LDAP Server, information is fetched directly from the SOP guaranteeing that you have always an up to date list of contacts.

Note that LDAP Server is only compatible with baseline 2 SOPs. An alternative solution for baseline 1 is provided below.
Access the directory with Polycom IP331:
- Via the Softkeys under the screen
- press "more"
- press "Dir"
- press "Corp Dir" (item 2)
- Enter the first letters of the name of the person you are looking for
- navigate through the results then press "Dial" or pickup the handset to initiate the call.
Requirements
- LDAP Server 1.4.0
- Polycom Phone Support 4.1.0
Supported phones:
- Polycom IP6000
- Polycom IP550
- Polycom IP670
- Polycom IP650
- Polycom IP560
- Polycom IP331
- Polycom IP450
- Polycom IP7000
- Polycom IP335
- Polycom VVX500
- Polycom IP330 (not possible to call the contact mobile phone)
Installation
Install the LDAP Server.
The first step is to install the LDAP Server. You can find the administration guide
here, installation instructions are detailed in this document.
Install the Polycom Support Module

Navigate to: Advanced > Module Configuration > Polycom Phone Support
Set 'Corporate Directory' option to 'yes', and install the module.
Navigate to: Resources > IP Phone > Edit Polycom
Set 'Directory Storage' to 'Local'.
Navigate to: Apply Changes > Apply Changes
Reload the configuration of your phones so that they take in account the new parameter. If you start your phones for the first time, you don't need to do this step.
Navigate to: Menu > Settings > Basic > Update Configuration
Alternative
Requirements
- Install Polycom phone support 2.0.0+
- Configure Polycom resource 3.0+
Installation
In the resource configuration, fill in the application URL like:
/polycom/Dir.php?mode=dummy
Apply the changes and reboot the phone so it downloads this new configuration.
To use the service,
Navigate to: Menu > Applications > Apps Home.
You will be presented with a screen where you can fill in LN (Last Name) and FN (First Name). Use the arrow keys to navigate between them and navigate to the arrow shaped button to confirm the search.
You can use the arrow keys to browse through the results. Press the confirmation (v-shaped) button to call the displayed contact.